| M-11
Bolt Disassembly |
This is page 3 of the M-11 Bolt
Disassembly tutorial. If you would like to go to the previous
page click on the link below.
Click
here to return to previous page of this tutorial
|
| Steps
6 through 8 |
| Step
6 |
| |
| Once
again you will need your hammer and punch pin set because
we are going to reinstall the extractor.
Take your extractor and
slide the little extractor spring over the “spring
arm” of the extractor (sorry not pictured).
Try to hold the extractor
and spring together and place them both back into the
extractor recess of the bolt (sorry not pictured).
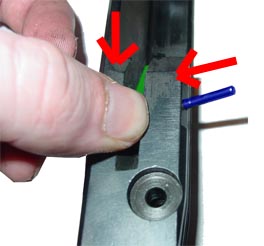
Apply thumb pressure
to line up the retainer hole of the extractor, marked
in green, so the roll pin, marked in purple, can be
reinserted.
Gently tap the roll pin
into the retainer hole until it is flush with the bolt.
No part of the roll pin should be protruding from any
side.
|
|
| Step
7 |
| |
|
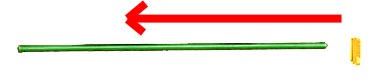
Now
lets install the recoil rod back into the bolt. Take your
recoil plate and a buffer, marked in yellow, and line
the holes on them up. Slide
the recoil plate followed by a buffer on to the recoil
rod, marked in green, from the front (the end that has
the hole for the roll pin on the recoil rod). The recoil
rod has one end flattened out so it is impossible to
install the recoil plate from the other direction. Since
the recoil rod is larger then the ejector rod it is
also impossible to stick it through the wrong hole.
The buffer should be
installed so that it separates the bolt from the recoil
plate.
|
| |
|
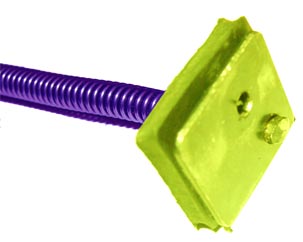
| Now
slide the recoil spring, marked in purple, onto the recoil
rod, marked in green. |
| If you
did this correctly the recoil assembly should look some
thing like this, minus all the colors of course. |
|
 |
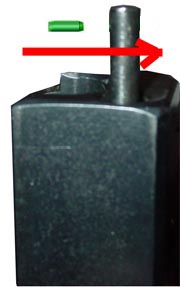
Take
the recoil assembly, marked in purple, and slide it inside
the bolt, marked in green, through the recoil rod hole. |
As you
compress the recoil assembly and bolt together, reinsert
the roll pin, marked in green, through the front of the
recoil rod. The roll pin should protrude equally on both
sides. Once the roll pin is in place it is safe to decompress
the recoil assembly.
FOR A MODIFICATION to make installing/replacing the roll pin and recoil spring easier, check out
Page 5 of this tutorial.
|
|
| Step
8 |
| |
|
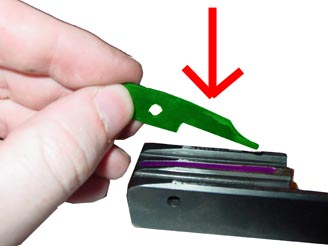
Next
we are going to reinstall the firing pin. To do this,
turn the bolt upside down and drop the firing pin, marked
in green, into the firing pin recesses, colored purple,
on the bolt. Make sure the firing pin is inserted in the
same orientation as shown in the picture. |
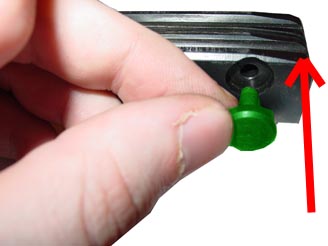
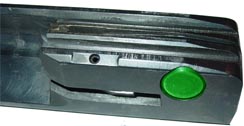
Now take the retention
pin, colored in green, and insert it into the retention
cut out hole. The retention pin should sit flush with
the bolt. If it does not, then the firing pin may have
to be moved a little to get the retention pin hole lined
up on the inside.
|
|
| Click
here to go to page 4 of this tutorial |
|